For photographers, having a dedicated space to work in can make all the difference. A studio provides the ideal setting for professional-quality photos, without the need to worry about weather or lighting conditions. Setting up your dream photography studio can be a daunting task, but with the right tools and a little creativity, you can transform any space into a creative oasis. From choosing the perfect location and lighting to selecting the best equipment and props, this blog post will guide you through the process of creating your perfect photography studio. Whether you’re a professional photographer or just starting out, this post will provide you with tips and tricks to create a space that inspires you and helps you capture beautiful images. So, let’s get started on turning an empty space into your dream photography studio!
Introduction: The importance of a dedicated photography studio
When it comes to photography, having a dedicated studio space can make a world of difference in the quality and creativity of your work. A photography studio provides a controlled environment where you can manipulate lighting, experiment with backdrops, and create a personalized atmosphere that truly reflects your artistic vision.
One of the key benefits of having a dedicated studio is the ability to have complete control over the lighting conditions. In a studio setting, you can utilize professional lighting equipment, such as strobes or continuous lights, to achieve the desired effect for your photographs. This level of control allows you to create stunning portraits, product shots, or still life images with precision and consistency.
Moreover, a photography studio provides the opportunity to experiment with various backdrops and props. By having a dedicated space, you can set up different scenes and create unique compositions tailored to your clients’ needs or personal projects. Whether you’re aiming for a clean and minimalistic look or a vibrant and dynamic setting, a studio allows you to bring your creative ideas to life without limitations.
Additionally, a dedicated studio space offers convenience and professionalism. Instead of relying on outdoor locations or makeshift setups, having a studio ensures that you always have a reliable space to work in. This enhances your professionalism and provides a sense of reliability to your clients. It also allows you to create a comfortable and welcoming environment where your clients can feel at ease, resulting in more natural and authentic photographs.
Assessing your needs: Determining the size and layout of your studio space
When setting up your dream photography studio, it is crucial to assess your needs and determine the size and layout of your studio space. This step is essential as it lays the foundation for creating a functional and inspiring environment that meets your specific requirements.
Start by considering the type of photography you specialize in and the equipment you use. If you primarily shoot portraits, you may need a smaller space compared to a studio focused on fashion or product photography, which typically requires more room for lighting setups and props.
Take into account the number of people you typically work with, including clients, assistants, and models. This will help you determine the optimal size for your studio. Additionally, consider the amount of storage space you require for your equipment, props, and backdrops.
The layout of your studio is equally important. Think about the flow of movement within the space and how different areas will be utilized. For example, you may want to have a dedicated shooting area, a client consultation area, a changing room, and a workspace for editing and post-production tasks.
Natural light is a valuable asset in photography, so assess the availability of windows and their positioning in the space. Consider how you can make the most of natural light or how you can control it effectively with curtains or blinds.
Moreover, think about the overall ambiance and atmosphere you want to create. Consider the colors, textures, and decor that align with your brand and the type of imagery you produce. Creating a welcoming and aesthetically pleasing environment will enhance the experience for both you and your clients.
Finding the perfect location: Factors to consider when choosing a studio space
The right space can inspire and enhance your work, while the wrong choice could hinder your creativity and productivity. When considering a studio space, there are several factors to keep in mind.
First and foremost, accessibility is key. Look for a location that is easily accessible to both you and your clients. A central or well-connected area will make it convenient for clients to reach you, increasing the likelihood of bookings and repeat business. Proximity to public transportation, major highways, and parking facilities should be taken into account.
Next, consider the size and layout of the space. Evaluate your specific needs and the type of photography you specialize in. A spacious studio with high ceilings may be ideal for fashion or portrait photography, while a smaller, more intimate space may be suitable for still life or product photography. Additionally, think about the availability of natural light and the ability to control artificial lighting to achieve the desired aesthetic for your shoots.
The overall ambiance of the location is also important. Your studio should reflect your brand and personal style. Look for a space that exudes creativity and inspires you and your clients. Consider the surrounding environment and any potential sources of noise or distractions that could impact your work.
Finally, don’t forget about practical considerations such as affordability, lease terms, and any necessary permits or licenses. It’s essential to find a space that fits within your budget and meets all legal requirements.
Lighting considerations: Natural light vs. artificial lighting options
The type of lighting you choose can significantly impact the overall look and feel of your photographs. As you weigh your options, it’s important to understand the benefits and limitations of both natural light and artificial lighting.

Natural light has a unique quality that can create beautifully soft and diffused lighting conditions. It can add a natural warmth and depth to your images, particularly during the golden hours of sunrise and sunset. Harnessing the power of natural light can provide a sense of authenticity and a connection to the environment in your photographs. However, it is important to note that natural light is highly dependent on the time of day, weather conditions, and the direction of light. This means that you may have limited control over the lighting setup and may need to adapt your shooting schedule accordingly.
On the other hand, artificial lighting options offer more control and consistency in your studio environment. Studio strobes, continuous lights, and modifiers allow you to shape and manipulate light according to your creative vision. With artificial lighting, you have the flexibility to create dramatic shadows, control the intensity and color temperature of the light, and experiment with various lighting setups. This can be particularly beneficial for portrait photography, product photography, or any genre that requires precise control over lighting conditions.
Ultimately, the choice between natural light and artificial lighting options depends on your personal style, the type of photography you specialize in, and the level of control you desire. Many photographers often utilize a combination of both natural and artificial lighting sources to achieve the desired effect. For instance, you may choose to have a studio space with large windows to take advantage of natural light while also incorporating artificial lighting for additional versatility.
Essential equipment and tools for your photography studio
Setting up your dream photography studio requires careful consideration of the essential equipment and tools that will elevate your creative space. These items are not only crucial for capturing stunning images but also for creating a comfortable and efficient working environment.
First and foremost, a high-quality camera is the heart of any photography studio. Invest in a professional-grade DSLR or mirrorless camera that suits your specific needs and shooting style. Look for features such as excellent image resolution, low-light performance, and the ability to interchange lenses.
Alongside your camera, a collection of versatile lenses is essential. Consider investing in a wide-angle lens for capturing expansive landscapes or architectural shots, a standard zoom lens for everyday use, and a telephoto lens for capturing distant subjects with great detail.
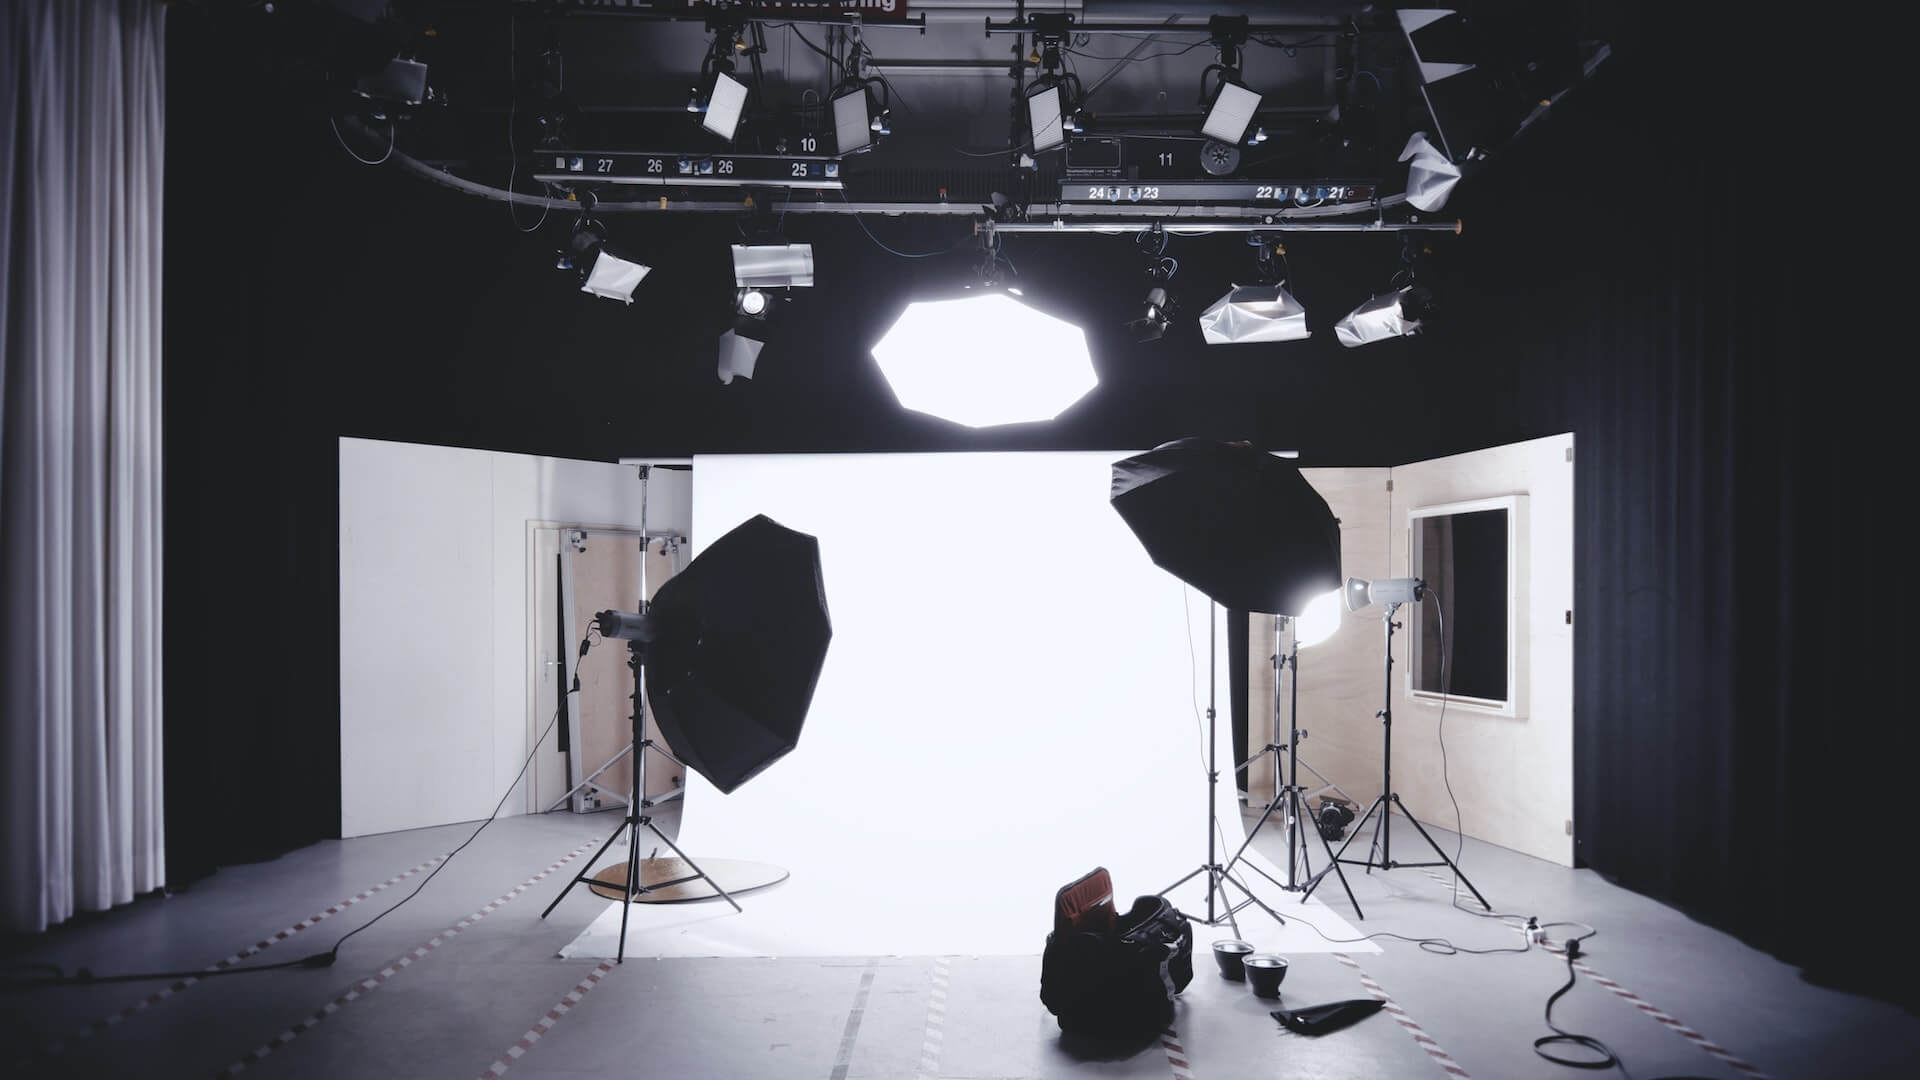
To control the lighting in your studio, a set of reliable and adjustable studio lights is a must-have. Studio strobes or continuous lights provide the flexibility to create the desired lighting effects for different types of photography. Additional light modifiers like softboxes, umbrellas, and reflectors help shape and soften the light, adding depth and dimension to your images.
A sturdy tripod is another indispensable tool for your studio. It provides stability and allows for precise composition, particularly when shooting long exposures or utilizing slower shutter speeds. Look for a tripod that is durable, adjustable, and capable of supporting the weight of your camera and lenses.
In addition to the basic equipment, consider investing in a range of accessories that will enhance your photography experience. These may include a remote shutter release for minimizing camera shake during long exposures or self-portraits, a light meter for precise exposure readings, and a color calibration tool to ensure accurate color reproduction in your images.
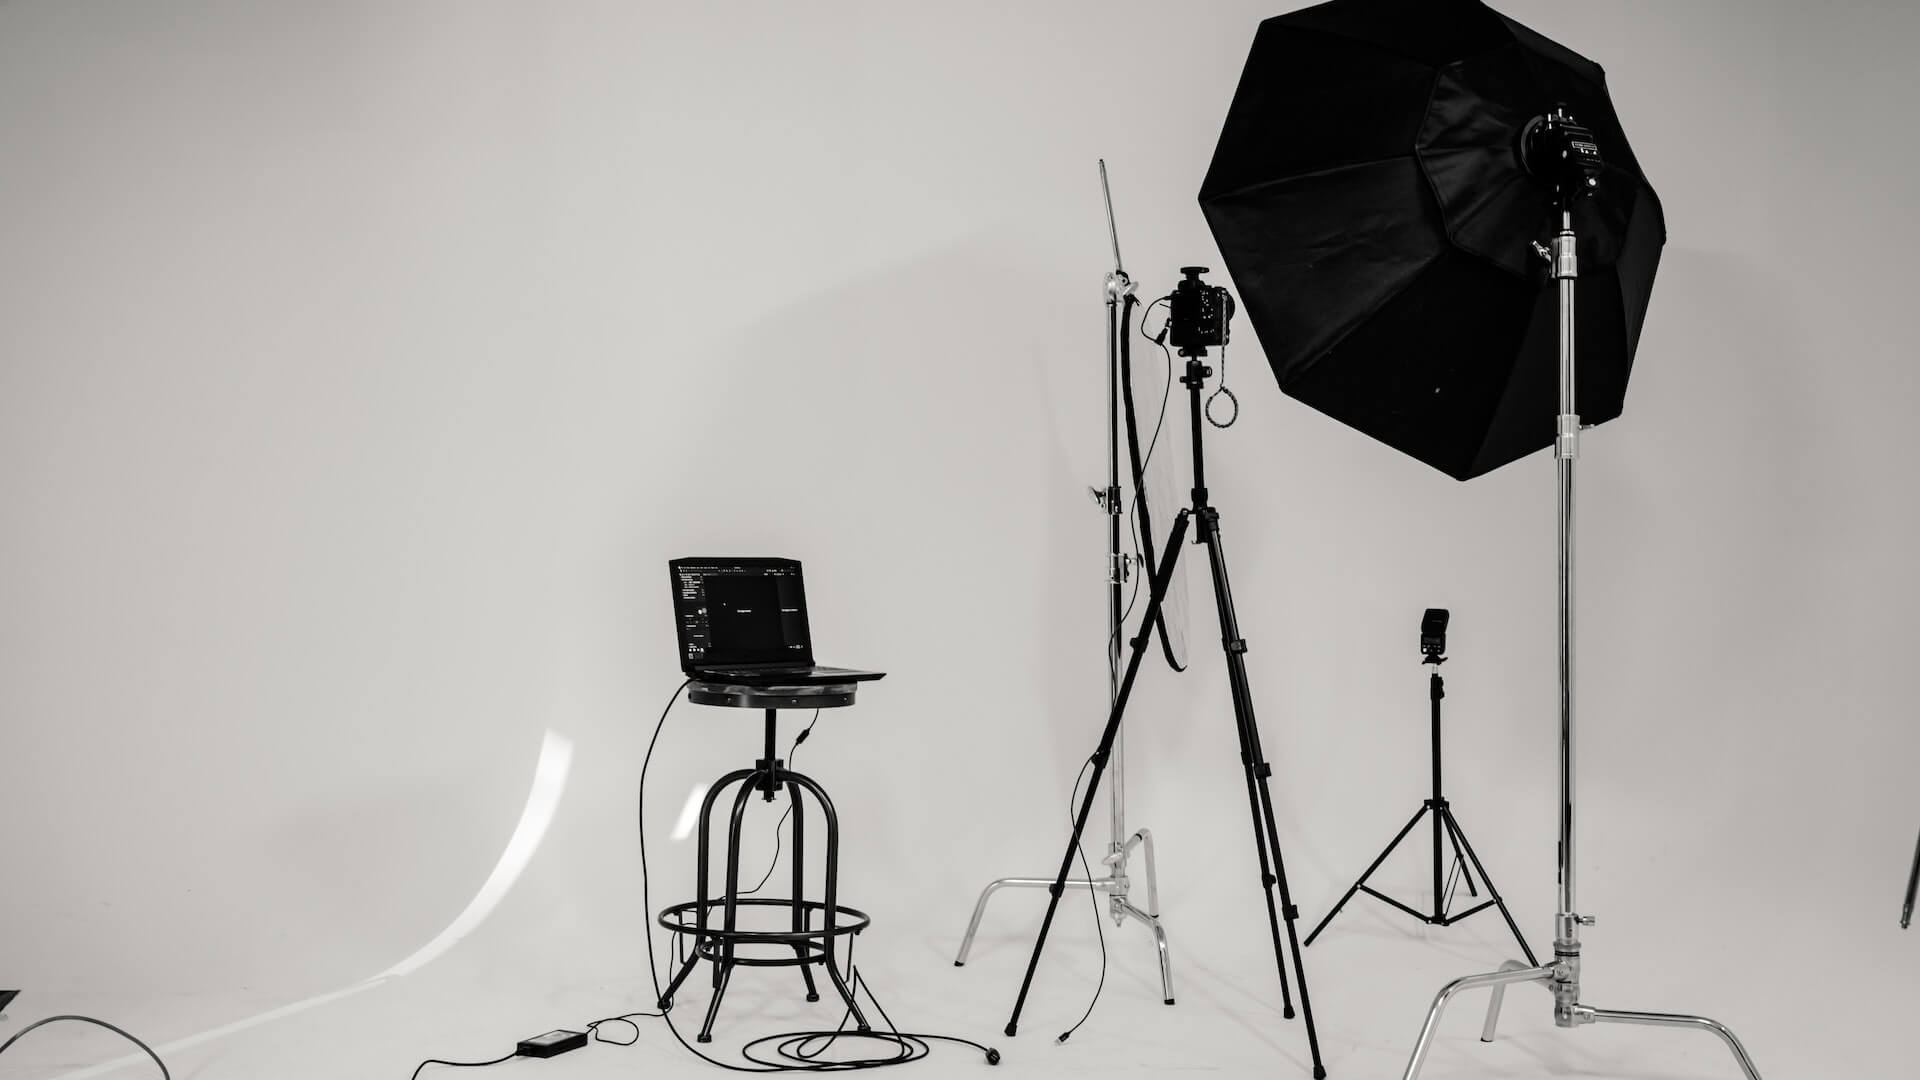
Lastly, an efficient workflow is essential for managing and editing your photographs. Invest in a reliable computer or laptop with sufficient processing power and memory to handle the demands of photo editing software. A high-resolution monitor with accurate color representation is crucial for precise image editing. Don’t forget to back up your images regularly to protect your valuable work from potential data loss.
Creating a functional workspace: Organizing your equipment and props
An organized and well-designed studio will not only streamline your workflow but also contribute to a more professional and creative atmosphere. When it comes to organizing your equipment and props, there are a few key considerations to keep in mind.
Firstly, invest in storage solutions that suit your specific needs. This could include shelves, cabinets, or drawers to store your cameras, lenses, lighting equipment, and other essential tools. Consider the size and weight of your equipment to ensure that your storage solutions can handle the load and are easily accessible.
Next, categorize and label your equipment and props for easy identification. This will save you valuable time searching for specific items during a shoot. Create a system that works for you, whether it’s using color-coded labels, clear storage bins, or digital asset management software.
Additionally, think about the layout of your studio space. Arrange your equipment and props in a way that maximizes efficiency and allows for smooth transitions between setups. Consider creating dedicated areas for different types of photography, such as a portrait setup, product photography area, or a designated space for props and backdrops.
Don’t forget about the importance of proper maintenance and cleaning. Regularly clean your equipment to ensure optimal performance and longevity. Create a cleaning schedule and establish habits that promote a tidy and organized workspace.
Lastly, make sure to regularly assess your storage needs as your equipment collection and business grow. Stay open to adapting and improving your organization system to accommodate new gear and creative ventures.
Designing a visually appealing studio: Choosing the right color scheme and decor
Designing a visually appealing photography studio is essential to creating an inspiring and welcoming space for both photographers and clients. One of the first considerations in this process is choosing the right color scheme. The colors you select will set the overall mood and atmosphere of the studio, so it’s important to choose wisely.
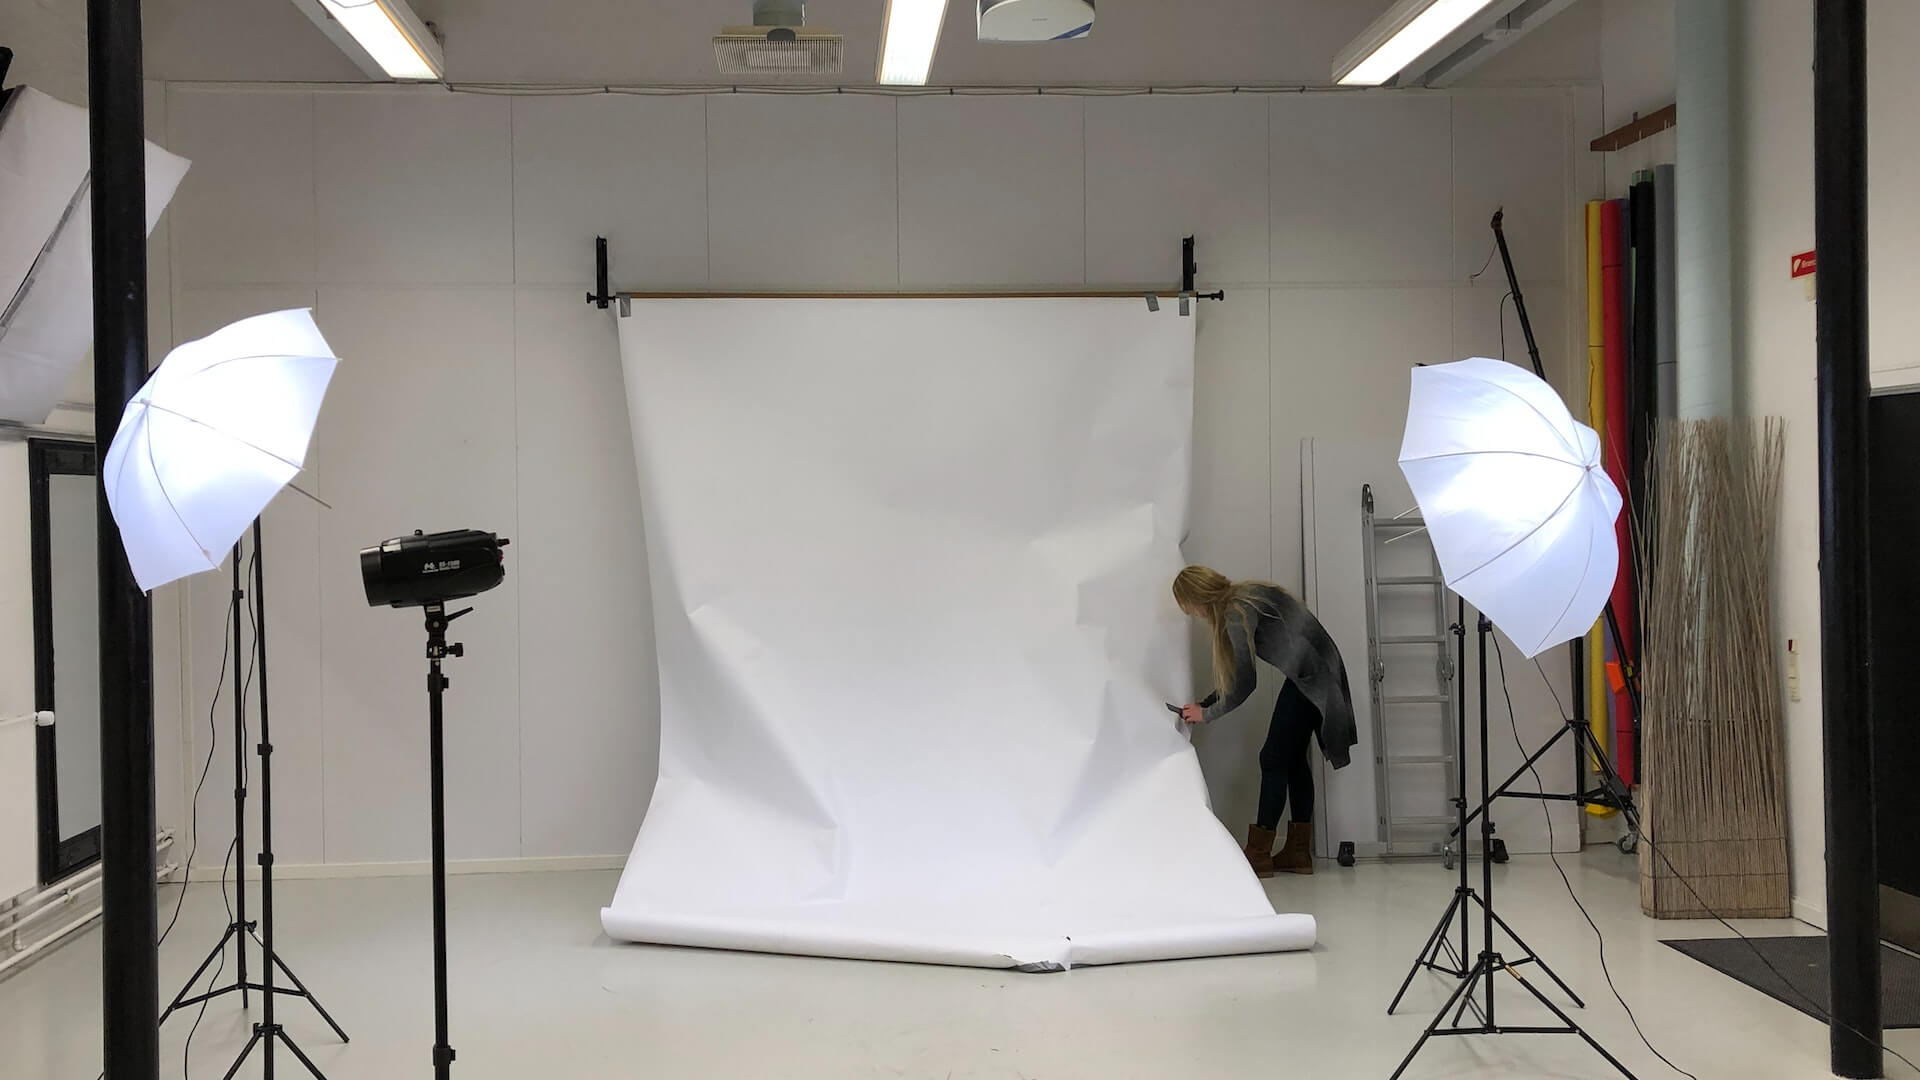
Start by thinking about the type of photography you plan to focus on in your studio. Are you aiming for a classic and timeless look, or do you prefer a bold and vibrant aesthetic? For a classic style, neutral tones like whites, grays, and soft pastels can create a clean and elegant backdrop. If you want to make a statement and create a more vibrant atmosphere, consider incorporating bold and contrasting colors that reflect your brand and creative vision.
In addition to color, the decor of your studio plays a crucial role in creating the desired ambiance. Consider the style and theme you want to convey and choose decor elements that complement it. For example, if you have a vintage-inspired studio, incorporating antique furniture, vintage cameras, and unique props can enhance the overall aesthetic. On the other hand, a modern and minimalist studio may benefit from sleek and clean-lined furniture pieces, abstract artwork, and minimalistic decor.
Creating a comfortable environment: Adding seating, storage, and amenities
Adding seating, storage, and amenities can transform an empty space into a cozy and functional oasis.
Firstly, consider adding comfortable seating options for your clients. Whether it’s a plush sofa, stylish chairs, or even bean bags, providing a comfortable seating area allows your clients to relax and feel at ease during their session. This not only enhances their overall experience but also encourages them to stay longer and potentially book additional sessions in the future.
In addition to seating, incorporating ample storage solutions is crucial for maintaining a clutter-free and organized studio. Invest in shelves, cabinets, and storage containers to keep your equipment, props, and accessories neatly arranged. This not only creates a professional and efficient workspace but also saves you time and frustration when searching for specific items during shoots.
Furthermore, don’t underestimate the power of amenities in your photography studio. Consider adding a mini-fridge stocked with refreshments for both yourself and your clients. This small gesture can go a long way in ensuring everyone stays hydrated and comfortable throughout the sessions. Additionally, having a dedicated restroom or a private changing area can add convenience and professionalism to your studio setup.
Lastly, don’t forget about the overall aesthetics and ambiance of your studio. Incorporate elements like soft lighting, soothing music, and pleasant scents to create a calming and inspiring atmosphere. This attention to detail will not only make your clients feel pampered but also contribute to a positive and memorable experience that they will be eager to share with others.
Final touches and personalization: Adding personal touches to make it your own
After setting up the main components of your dream photography studio, it’s time to add those final touches and personalization that will truly make it your own creative oasis. This is where you can infuse your personality and style, creating a space that inspires you and sets the right mood for your work.
One of the easiest ways to personalize your studio is through wall decor. Consider hanging your favorite photographs or artwork that resonates with your aesthetic. This not only adds visual interest but also serves as a source of inspiration for you and your clients. Additionally, you can display any awards or accolades you’ve received to showcase your expertise and build trust with potential clients.
Another way to add a personal touch is through the use of props and accessories. These can be unique to your style and niche. For example, if you specialize in newborn photography, you can incorporate cute and cozy blankets, stuffed animals, or other baby-related props. If you’re into fashion photography, you may want to have a selection of stylish garments or accessories available for shoots. These personalized elements can help create a signature look for your studio and set you apart from the competition.
Don’t forget to pay attention to the smaller details as well. Consider adding plants or flowers to bring a touch of nature and freshness to your space. Invest in comfortable seating and cozy lighting to create a welcoming and comfortable atmosphere for your clients. You can also add personal touches through the use of color schemes, curtains, or curtains that match your branding or personal preferences.
Lastly, don’t be afraid to experiment and evolve your studio’s personalization over time. As your style and taste evolve, you can update and refresh the space to reflect those changes. Remember, your photography studio is not just a place to work, but a reflection of your creativity and passion. By adding personal touches, you’ll create a space that not only inspires you but also leaves a lasting impression on your clients.
Conclusion
Creating a photography studio from an empty space can be a daunting task, but with the right guidance and tips, you can transform it into a creative oasis that matches your vision. From choosing the perfect lighting setup to organizing your equipment and props, we covered all the essential steps to help you create a space that is both functional and visually appealing. Now it’s time to let your creativity flow and capture stunning images in your very own dream photography studio.